CityEngine中纹理贴图之道(一)
-
2018-04-01
经常看到官微、公众号的各种推送,了解到很多轰动一时的大片和电游的视觉制作都有CityEngine 助力过。CityEngine 在影娱视觉行业早已硕果累累,而对于GIS大众,CityEngine 算是刚从幕后走到了台前,从神秘娱乐圈走近了烟火人间。这几年来,这个不姓“Arc”的非主流产品在不断地推陈出新,吸引着慕名围观的用户去了解。3D模型的纹理贴图问题通常是建模中的高频问题,作为前排围观群众之一,我今天就用CityEngine做一面“墙”娱乐一下吧。
环境: Esri City Engine 2017.1
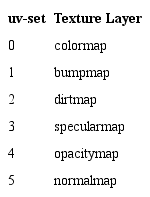
在 CityEngine中的 shape 对象具有material属性,这一属性可以控制模型的纹理贴图、阴影效果、外观等。CityEngine 支持的纹理图片的格式有:.bmp、.gif、.jpg/.jpeg、.png、.tif/.tiff。 CityEngine贴图支持6个纹理通道,它们通过特定的关键字来表达,如下:
下面我通过几个实例来说明下它们的用途:

基于共同的基础脚本向下进行,这里不再解释,相信你一看即懂。
/**
* File: MyTestforBaseTexure.cga
* Created: 21 Mar 2018 08:26:37 GMT
* Author: Xiaoyan Mu
*/
version "2017.1"
attr height = 6
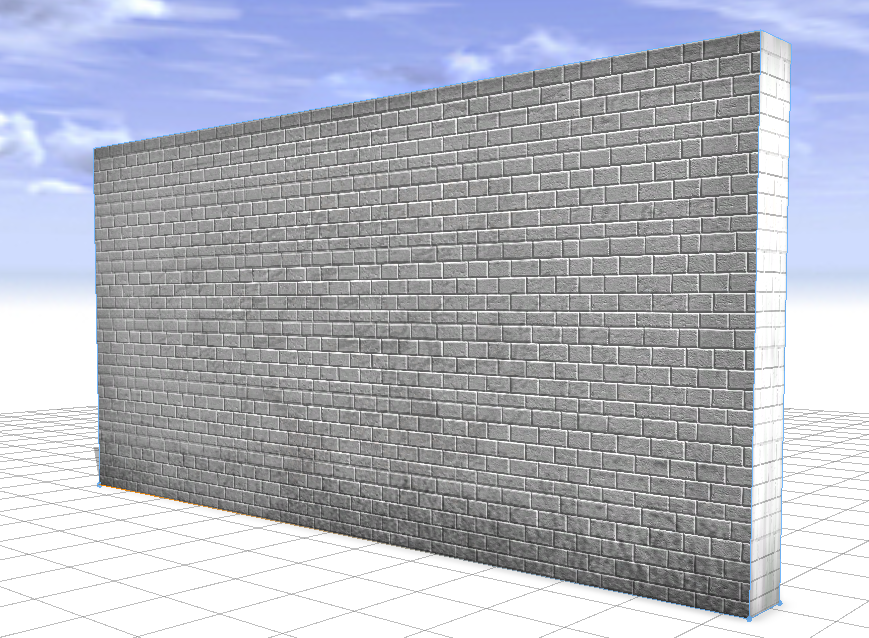
wall_tex = "facades/textures/brickwall.jpg"
dirt_tex = "facades/textures/dirtmap.15.tif"
graffiti_tex = "facades/kiktia/Graffiti.jpg"
Lot --> extrude(height) Building
Building --> comp(f) {side : Sidefacade}material.colormap
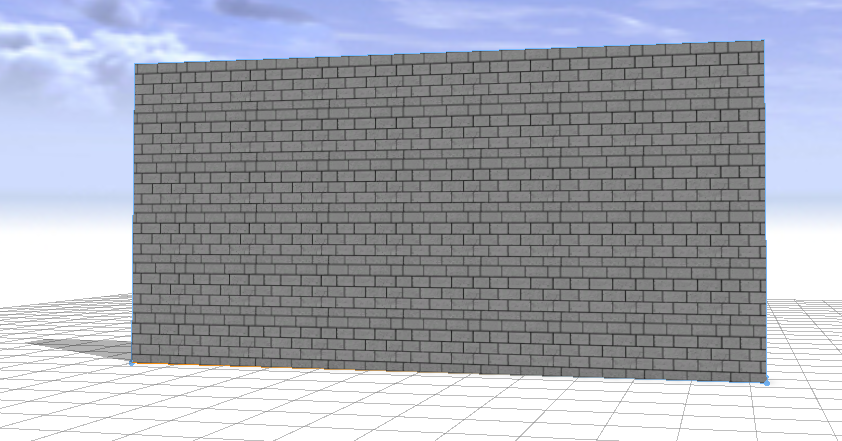
Sidefacade -->

	setupProjection(0, scope.xy, 1.5, 1, 1)

	texture(wall_tex)  # set(material.colormap,wall_tex)

projectUV(0) texture(wall_tex) ,实际是 set(material.colormap,wall_tex) 的简写,这个函数仅用于为当前shape指定纹理图片,而没有创建纹理坐标系。因此事先需要使用 setupProjection() ,用于指定贴图表面上的UV坐标系,以及贴图矩阵的排布样式。最后使用 ProjectUV()将贴图UV坐标系应用到贴图表面,这个过程有时被称为“烘焙(bake)”。相关函数的具体语法请查 帮助。
“烘焙”是个形象生动的词,是个3D建模领域的常用词,对于GIS圈子的朋友可能有点陌生,在一个论坛里找到一个描述觉得不错分享大家。
“Baking” generally refers to the process of recording as an image, some aspect of the Material or Mesh characteristics of a model. One value of this is that certain kinds of Material parameters can take longer to compute and apply to a model than an Image Texture, so it saves rendering time. Baking is usually done once a Material or Mesh is finalized.
In texture baking, for example, what is originally a procedural texture can be recorded as an image. Sometimes various “channels” of a material can be consolidated into a single image, simplifying the number of texture images used. Material colors applied in Texture Paint mode can be saved to an image. Texture baking can also help with disguising seams on a UV unwrap, a somewhat complicated but very useful process.
In normal baking, the mesh normals (which affect how light appears to reflect from the model’s surface) can be recorded – this results in very specialized images with RGB values based on normal vectors.
Usually baking requires having the model UV-unwrapped and -mapped, so the resulting image is properly fit to the model.
material.bumpmap
material.bumpmap 可以实现贴图的浮雕效果。
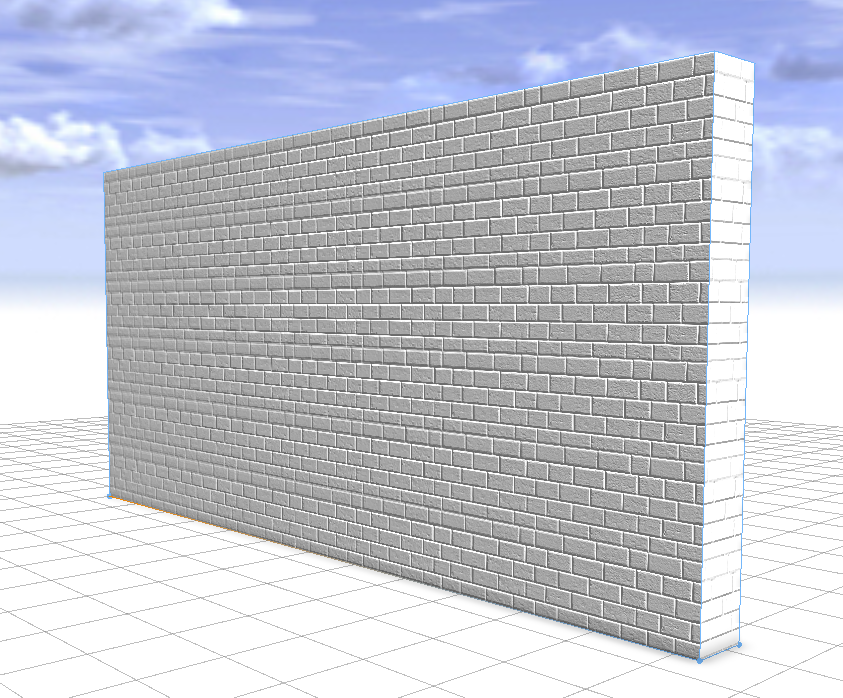
Sidefacade -->

	setupProjection(1, scope.xy, 1.5, 1, 1)

	set(material.bumpmap,wall_tex)

	projectUV(1)
material.dirtmap
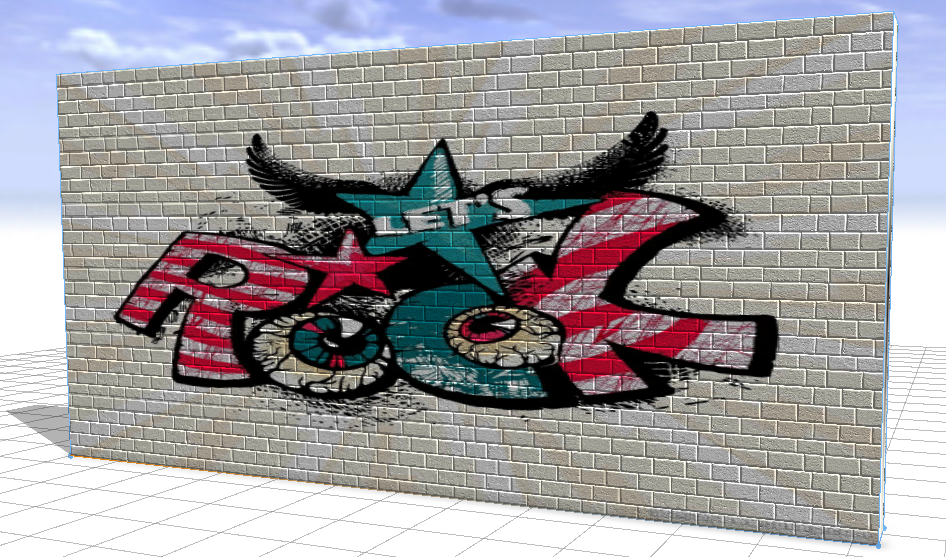
如果想使这面墙更逼真,来点“做旧”的感觉,可以使用 material.dirtmap 通道来增加图片镶嵌的效果。
Sidefacade -->

	setupProjection(0, scope.xy, 1.5, 1, 1)

	texture(wall_tex)

	projectUV(0)

    # Add dirtmap channel

    setupProjection(2, scope.xy, scope.sx, scope.sy)

	set(material.dirtmap, dirt_tex)

projectUV(2) 相同的方法来做一面涂鸦墙也可以哦。(涂鸦图片来自网络,侵删)
将dirtmap换张图, set(material.dirtmap, graffiti_tex)
先到这里,下篇继续……
##
文章来源:http://kikitamap.com/2018/03/22/textureinCE/